Overview
Headers and footers can be added to report templates for your PDF exports. The steps below will add a header or footer to only one tab of a template at a time. To add headers to multiple tabs or templates, you will need to repeat the steps for all sheets/templates that need the header or footer.
Links to Chapters in This article
Add a Header or Footer to a Template
Include Header/Footer in Package Download
Add a Header or Footer to a Template
Step 1. Navigate to Reports & Libraries > Libraries.
Step 2. Select any report and then click the Edit ![]() button to the right of the template that needs a header or footer.
button to the right of the template that needs a header or footer.
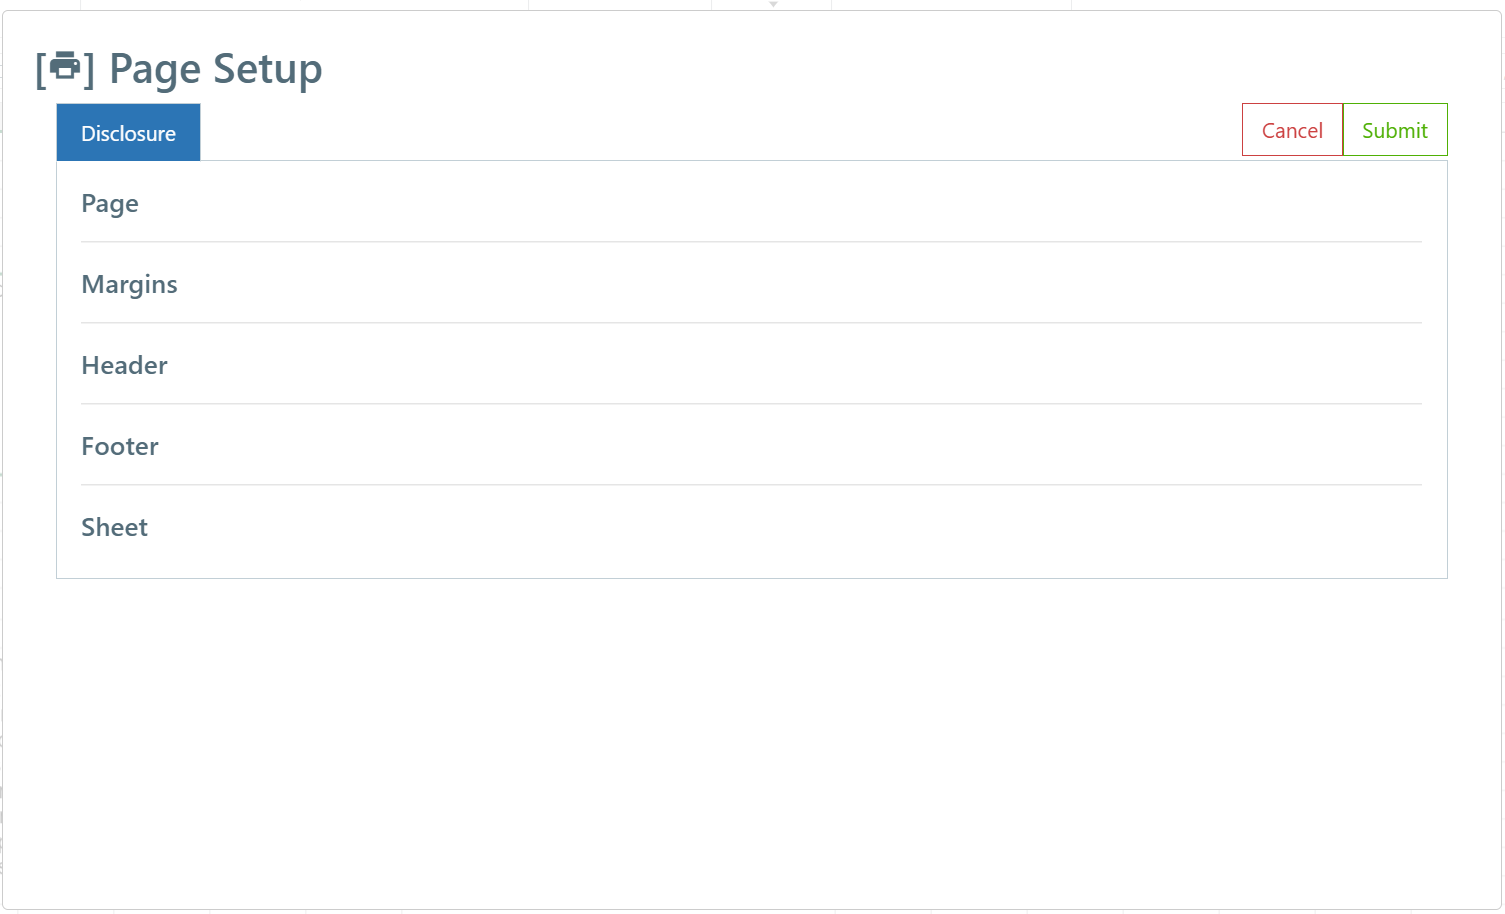
Step 3. Click the Page Setup  icon in the blue section of the left editor bar.
Step 4. Click the tab across the top with the name of the tab that needs a header or footer.

Step 5. Click on either the Header or Footer section.

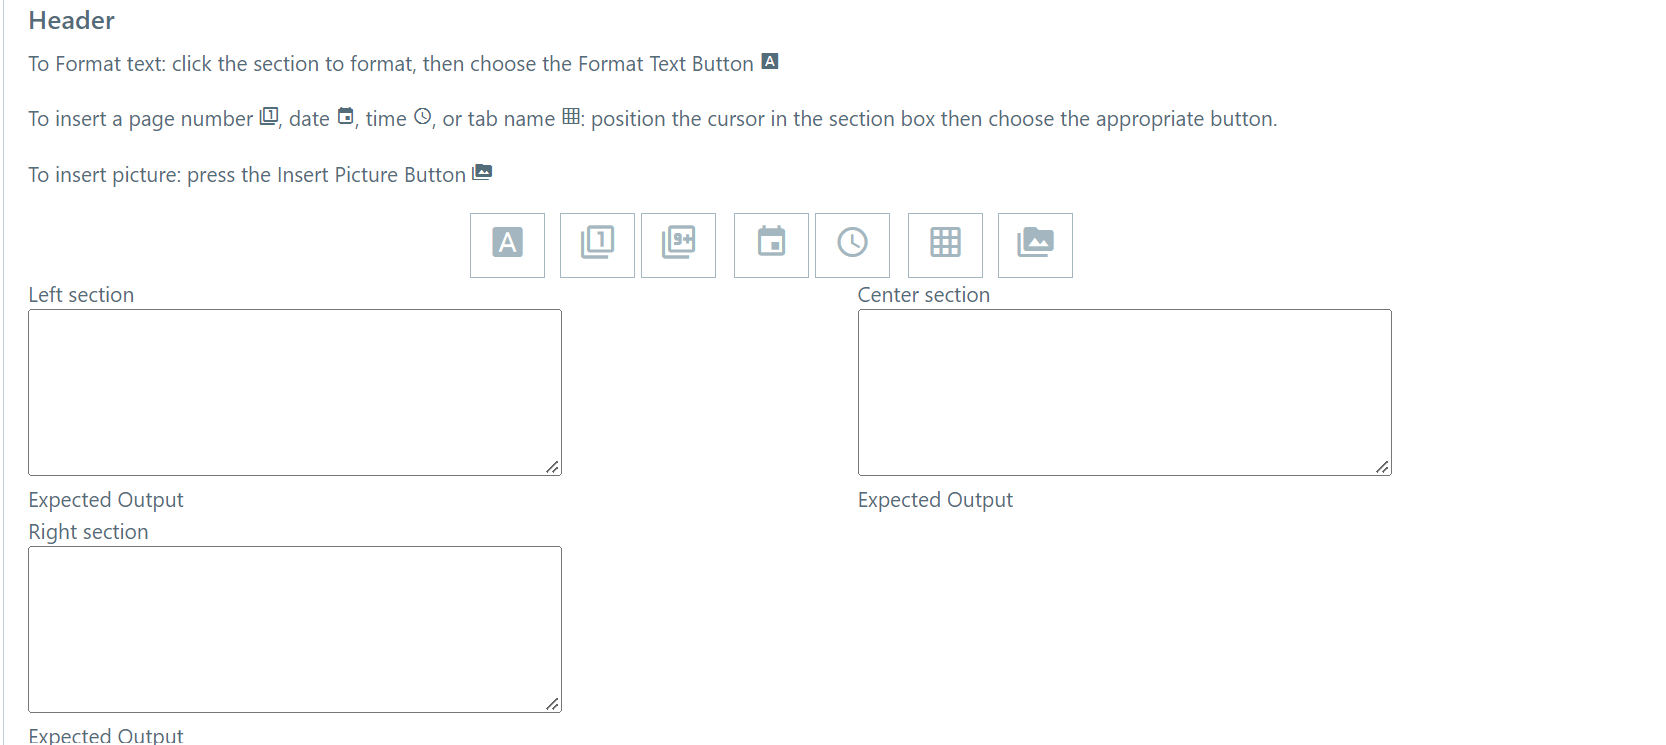
Step 6. Headers and footers can be aligned accordingly, left, center, or right, depending on how you'd like to align your content.

Step 7. Add text to the appropriate section, depending on where on the page the footer should appear.
Step 8. You can use the function buttons below to edit your header or footer:
-
 FORMAT TEXT: Choose the font, font style, font color, and strike-through settings.
 PAGE NUMBER: Starting with the First Page Number from the Page section, insert the current page number in the desired section.
 TOTAL PAGES: Insert the total number of pages in this workbook (not only this sheet).
 INSERT DATE: Dynamically reflects the date the report is run, similar to Excel's TODAY function.
 INSERT TIME: Dynamically reflects the time the report is run.
 INSERT SHEET NAME: Dynamically inserts the name of the current sheet.
 INSERT PICTURE: Insert an image from your local machine - the height of the image should be smaller than the header/footer margin.
Step 9. Underneath the Left, Center, and Right sections you'll see the Expected Output, which functions as a preview after text has been entered.
Adjust Header/Footer Margins
Step 1. While on the same tab of the Page Setup dialog, expand the Margins section.
Step 2. Set margins that will allow enough space for the text/images in your header/footer without overlapping the rest of your template. Our suggested defaults are below:
-
- Top/Bottom: .5 inch
- Left/Right: .25 inches
- Header/Footer: .3 inches
Step 3. Repeat all steps for each tab of the current template that needs a header or footer.
Step 4. Click the green Submit button.
Export Report to PDF
Step 1. In the green section of the left-hand Editor bar, click the Save  or Save As
  button.
Step 2. In the orange section of the Editor bar, click the Preview  button.
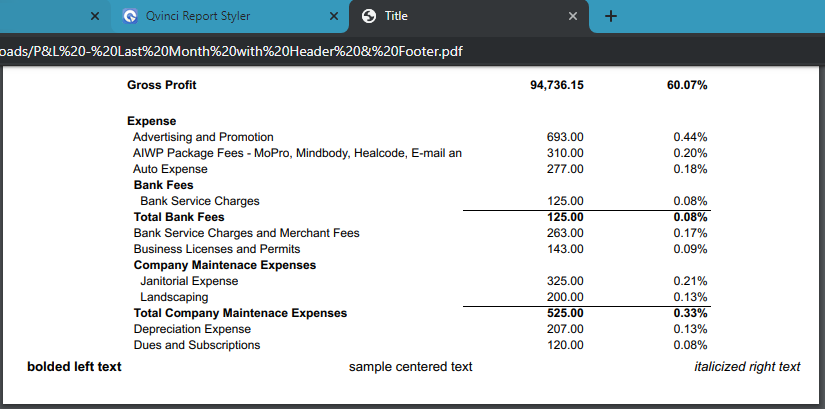
Step 3. From the preview, click on the Export to PDF  button and view the header or footer in your final document.

Include Header/Footer in Package Download
Step 1. Navigate to the Reports & Libraries > Libraries page.
Step 2. Click the blue Edit ![]() button next to an existing package, or click the green Create
button next to an existing package, or click the green Create ![]() button to create a new package and open the Package Editor.
button to create a new package and open the Package Editor.
Step 3. From the Reports tab, add the report with your header or footer to the package by dragging it to the PDF Exports section in the middle column.
Step 4. In the PDF Exports column, click on the report name, and more options will appear in the PDF Export Options box on the right.
Step 5. Be sure to click the Apply this Report's Page Setup box or the header/footer you set in the template will not apply.
Step 6. Click the green Save  button in the top right, then download your package.
Have Questions?
We're More Than Happy to Help
Schedule a call with Customer Success below, email us at support@qvinci.com or call us at 1-512-637-7337 Ext. 1 Available M-F, 7:30am-6:30pm CT and it is always FREE!

Comments
0 comments
Please sign in to leave a comment.