Overview
Once the Standard Chart of Accounts (SCoA) is created for the Client/Company, the Admin, Leaders, Managers, and Entity Syncers may begin mapping the incoming accounts to the SCoA in Qvinci.
To use the Classic Mapping page, view this article instead. The Advanced Mapping page allows users a faster way to map many accounts to the Standard Chart of Accounts using either Single or Bulk mapping options.
Video Tutorial
Mapping Single Accounts
Step 1. Click Tools > Map to SCoA from the program navigation menu, click the "Advanced Mapping" button across the top of the screen.

Step 2. Keep the "Toggle Mapping Method" on the top left corner selected on Single.

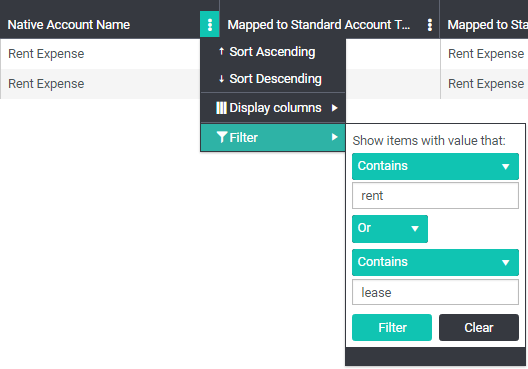
Step 3. To select your accounts, use the Sort/Filter option  in any column to be able to drill down to the native accounts from your accounting files you'd like to map.
- TIP: You can use the Sort Ascending option under the Standard Account Name column to view only unmapped accounts.
Step 4. If Cross Account Type Mapping is enabled, choose the Standard Account type where every account to be mapped should go.
- NOTE: You cannot map accounts across Report Types, i.e., P&L accounts cannot map to Balance Sheet account types, and vice versa.
Step 5. For every account to be mapped/remapped, choose the "Standard Account Name" where the account should go.
Step 6. Click the green "Save Mappings" button in the top right.
Bulk Mapping Accounts
Step 1. From the Tools > Map to SCoA page, click the "Advanced Mapping" button across the top of the screen.

Step 2. Choose the "Bulk" Mapping option in the top left.

Step 3. In the top center (step 2), choose first the Account Type and then the specific Standard Account you'd like to map to.

Step 4. All accounts that can be mapped to the chosen Standard Account will populate below. Use the Sort/Filter icon  in any column to find native accounts that should be mapped to this Standard Account.
Step 5. Under the Map to New Standard Account column, check the box for each account that should be mapped.
Step 6. Click the green "Map Selection" or "Map and Lock Selection" button in the top right to complete your mapping.

About Account Map Locking
There may be times when a user wants to manually map an account, where the account may be moved by applying a whitelist to the remaining accounts within that account type. To prevent this, that account may be "locked" so that the mapping is unaffected by the whitelist automapping.
-
-
SCoA accounts that contain locked mappings CANNOT be deleted or renamed via Manage > SCoA. However, users can update the whitelist for SCoA accounts with locked mappings.
-
Qvinci staff cannot upload a SCoA via the Admin Portal unless all Native to SCoA mappings are unlocked for selected Client/Company.
-
__________________________________________________________________________________________________________
Have Questions?
We're More Than Happy to Help
Schedule a call with Customer Success below, email us at support@qvinci.com, or call us at 1-512-637-7337 Ext. 1. Available M-F, 7:30am-6:30pm CT and it is always FREE!

Comments
0 comments
Article is closed for comments.