Overview
Qvinci allows for multiple user access levels. Users can have account-wide access or be limited to a single entity. They might require managerial access rights or perhaps only need report viewing access. Some users need the ability to create and publish reports for clients while others should be able to help administrate the layout of the account itself. There are a vast array of user roles and capabilities in Qvinci for Accountants to accommodate the desired hierarchy.
Client or Company level users are individuals who do not have access to view all Clients or Companies in a Qvinci account. Rather, they are granted access to specific Clients / Companies on a one-by-one basis, but they are able to see all Entities that exist in said Client / Company. Only the Admin or Leaders may set up users at the Client / Company level. Refer to the Account Level User Setup to create users at the account level.
Create Client / Company Level Users
Company level users may have, or may lack, administrative access, but these users are created with limited permissions in mind. These users are set up at the Company level. This means that they can see and report upon all Entities that are ever created in the particular Company(s) they have access to. Some of these users also have managerial privileges as well. However, these users do not have a global view to all Client Companies that exist in the account. The Admin and Leaders may create all Client Company level users. A Company level Manager may create other Company level users that are downstream in nature. View the Roles and Permissions Grid for further details.
Step 1. Navigate to the correct Client Company via the top left tab in the account
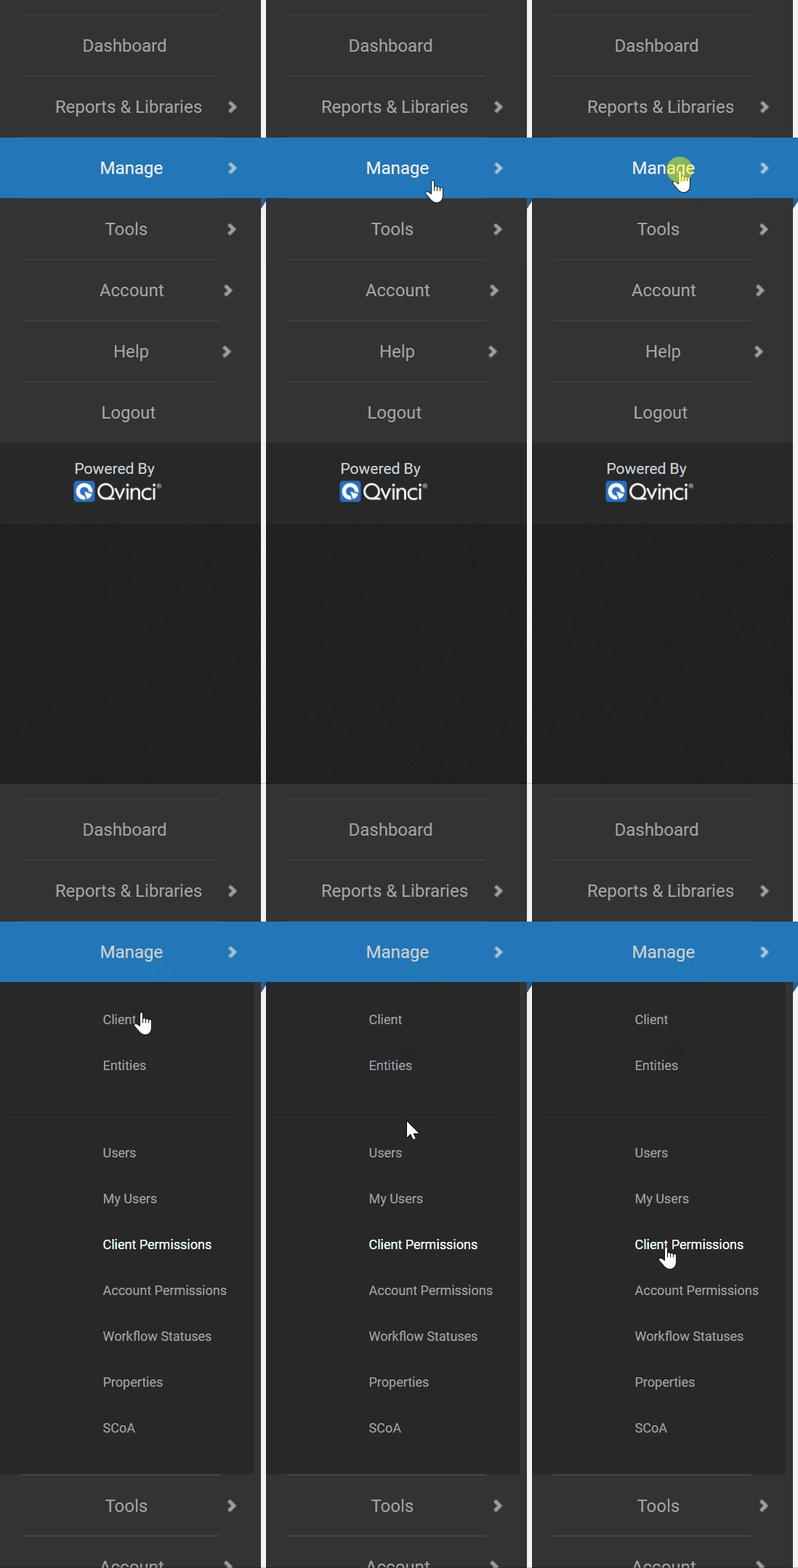
Step 2. Visit the Manage > Client Company Permissions menu.

Step 3. From the dropdown at the top of the screen select the permission level on which to create the user.

Refer to the Roles and Permissions Grid to learn more about permission types at the Client / Company level.
Step 4. Click the "Add Users" ![]() button on the right side of the screen
button on the right side of the screen
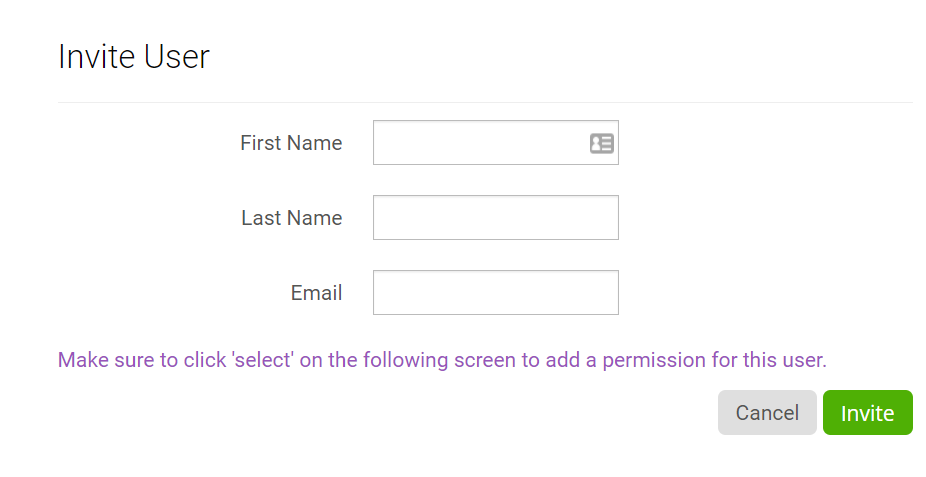
Step 5. If the user already exists as a lower-level user checkmark their name and "Select", otherwise click the "Invite User" ![]() button to add a new user.
button to add a new user.
Step 6. Enter the first name, last name and email of the new user and click "Invite".

Step 7. Click the Select ![]() button to save the user at the role level
button to save the user at the role level
When the user appears on the Client Company Permissions page (for the appropriate permission type) they have been successfully been set up for this specific Client Company.
Qvinci automatically emails invitations to new users and prompts them to set a password, otherwise existing users receive a notification of the new user role they are assigned to.
Have Questions?
We're More Than Happy to Help
Schedule a call with Customer Success below, email us at support@qvinci.com or call us at 1-512-637-7337 Ext. 1 Available M-F, 7:30am-6:30pm CT and it is always FREE!

Comments
0 comments
Article is closed for comments.