Overview
A wide array of users may be set up in Qvinci so that the account may be effectively managed. Only one Administrator may exist, but multiple levels of managerial users and report viewing-only users may also be configured. Admins, Leaders, and Managers may add additional users at the following levels:
- Account Level: These users can view reports for every Entity across the entire account and gain access to new files as they are added.
- Client/Company Level: These users can view reports for a specific Client/Company and gain access to new Entities within that Client/Company.
- Entity Level: These users are limited to viewing a specific Entity (or Entities) as assigned.
The steps to add users will vary depending on the level of access required. Learn more about User Roles to determine which level of access someone will need. You can then use the links below to add the user at the appropriate role.
Create Account-Level Users
Both the Admin and Leaders may create Account Staff. Only the Admin may create Leaders. These account-level users are set for global access viewing. This means that they can see and report upon all Entities, as well as on all clients/companies created in the account. Leaders have administrative and managerial privileges as well. Please view the Roles and Permissions article for further details.
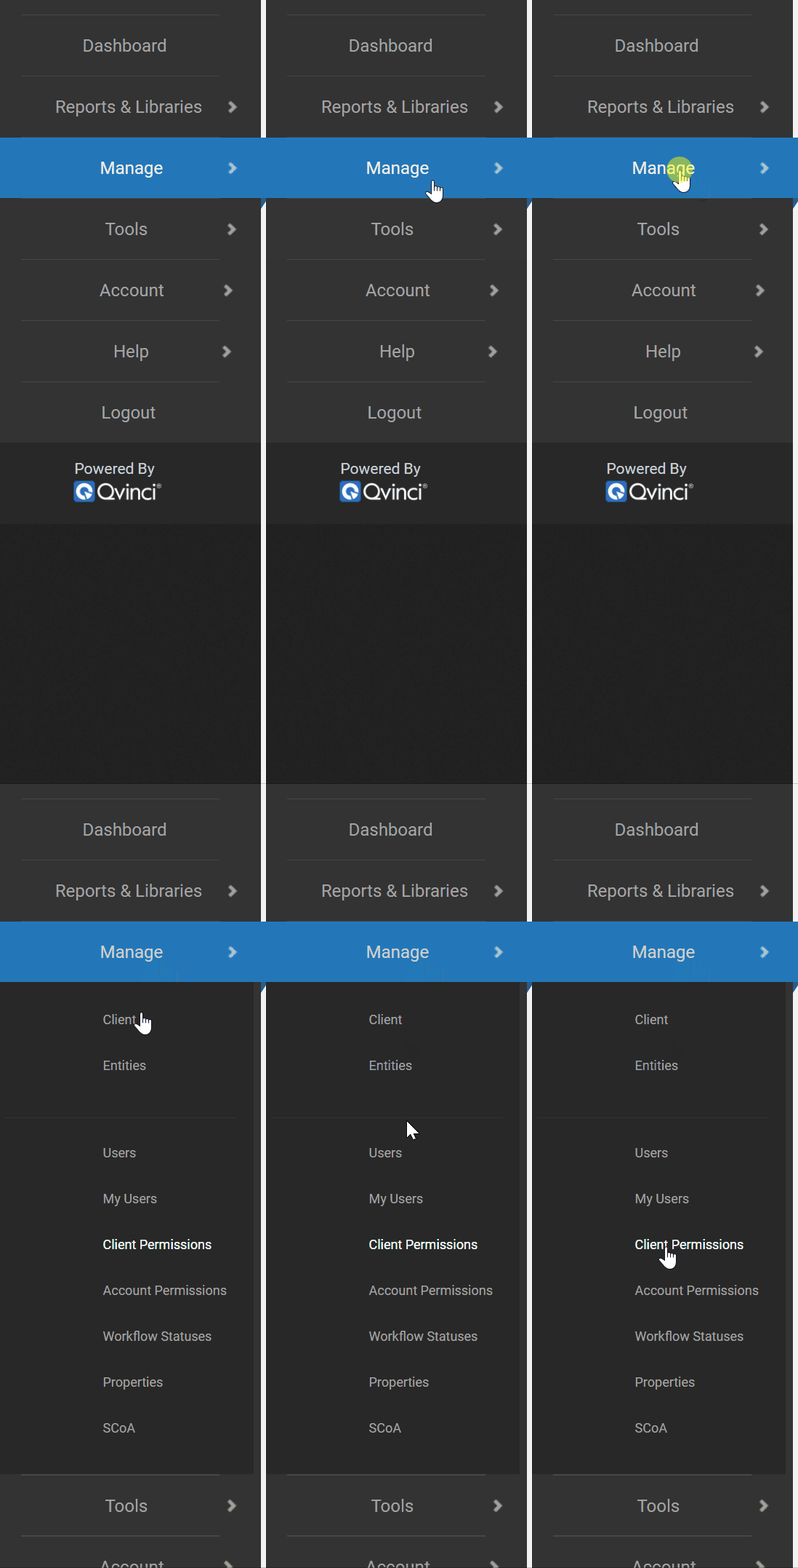
Step 1. Visit the Manage > Account Permissions menu.

Step 2. From the dropdown at the top of the screen, select the permission level on which to create the user. 
Step 3. Click the Add Users ![]() button on the right side of the screen.
button on the right side of the screen.
Step 4. If the user already exists as a lower-level user, checkmark their name and select, otherwise click the +Invite User ![]() button to add a new user.
button to add a new user. 
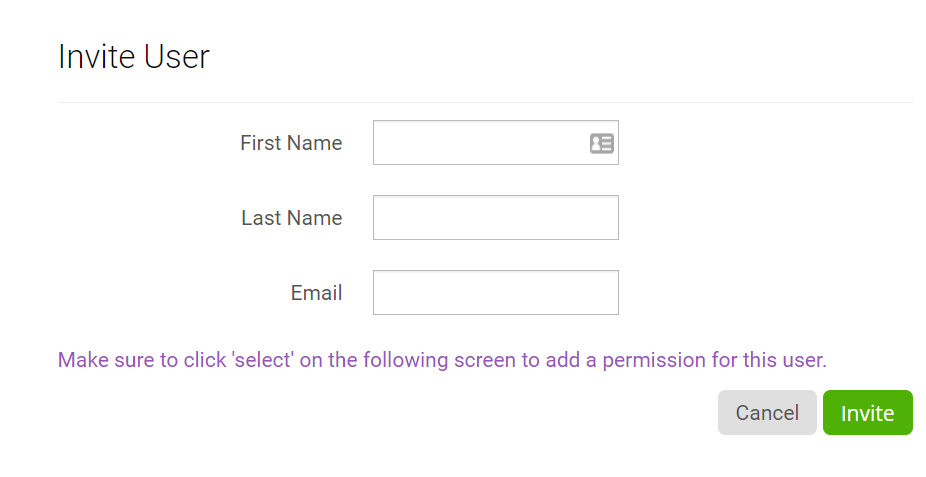
Step 5. Enter the first name, last name, and email of the new user and click "Invite."

Step 6. Click the Select ![]() button to save the user at the role level.
button to save the user at the role level.
When the user appears on the Account Permissions page, they have been set up with account-wide access.
Qvinci automatically emails invitations to new users and prompts them to set a password, otherwise existing users receive a notification of the new user role they are assigned to.
Create Client- / Company-Level Users
Company-level users may have, or may lack, administrative access, but these users are created with limited permissions in mind. These users are set up at the Company level. This means that they can see and report upon all Entities that are ever created in the particular Company(-ies) they have access to. Some of these users also have managerial privileges. However, these users do not have a global view of all Client Companies that exist in the account. The Admin and Leaders may create all Client-/Company-level users. A Company-level Manager may create other Company-level users that are downstream in nature. View the Roles and Permissions article for further details.
Step 1. Navigate to the correct Client Company via the top-left tab in the account
Step 2. Visit the Manage > Client Company Permissions menu.

Step 3. From the dropdown at the top of the screen, select the permission level on which to create the user.

Refer to the Roles and Permissions Grid to learn more about permission types at the Client/Company level.
Step 4. Click the Add Users ![]() button on the right side of the screen
button on the right side of the screen
Step 5. If the user already exists as a lower-level user, checkmark their name and select, otherwise click the Invite User ![]() button to add a new user.
button to add a new user.
Step 6. Enter the first name, last name, and email of the new user and click "Invite."

Step 7. Click the Select ![]() button to save the user at the role level.
button to save the user at the role level.
When the user appears on the Client Company Permissions page (for the appropriate permission type), they have been successfully set up for this specific Client Company.
Qvinci automatically emails invitations to new users and prompts them to set a password, otherwise existing users receive a notification of the new user role they are assigned to.
Create an Entity Viewer
An Entity Viewer has no administrative access in Qvinci and is not the user assigned to sync the financial data. This user is strictly report-viewing in nature. An Entity Viewer may be assigned to see a single Entity in the Client Company or may be granted access to see multiple Entities, even across multiple Client Companies.
Step 1. The Admin, Leader, or Manager should navigate to the correct Client/Company via the top-left tab in the account.
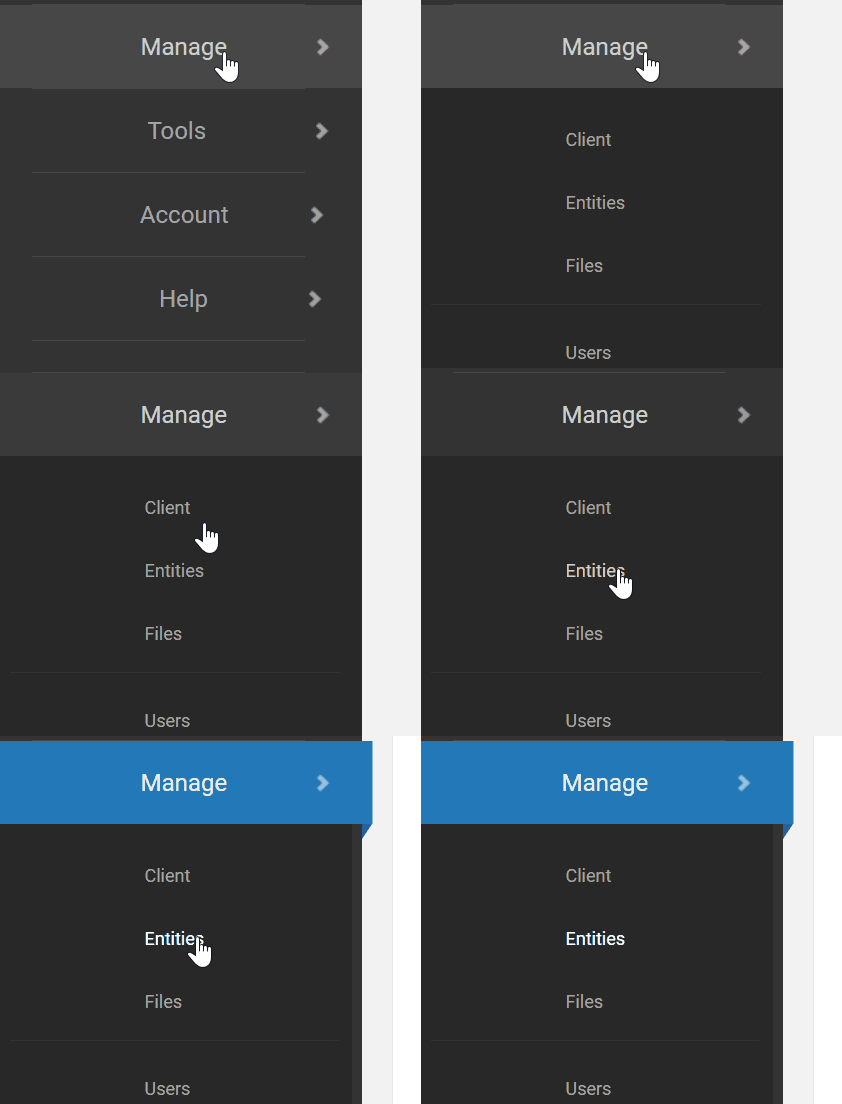
Step 2. From the correct Client/Company visit the Manage > Entities tab.

Step 3. Click on the desired Entity name and then select the Permissions link in the top-center of the screen.

Step 4. Click the Add Users ![]() button on the right side of the screen.
button on the right side of the screen.
Step 5. If the user already exists/appears, check next to their name and press Select ![]() .
.
Step 6. Otherwise, if a new user needs to be set up, click the Invite User ![]() button.
button.
Step 7. Enter the first name, last name, and email of the new user and click Invite.

Step 8. Click the Select ![]() button to save the user at the role level.
button to save the user at the role level.
When the user appears on the Permissions page for the Entity then they have been set up.
Qvinci automatically emails invites to new users and prompts them to set a password, otherwise existing users receive a notification of the new user role they are assigned to.
Repeat these steps to add a user to another Entity.
Create an Entity Syncer
One Entity Syncer may be assigned to an Entity. This user has the ability to sync the financial data to Qvinci for the Entity but also has report viewing access and SCoA mapping access by default. Typically, this user is set up when the Entity is created, but if a user is needing to be swapped out with another, the below steps should be followed:
Step 1. The Admin, Leader, or Manager should navigate to the correct Client/Company via the top-left tab in the account.
Step 2. From the correct Client/Company visit the Manage > Entities tab.

Step 3. Click on the desired Entity name and then select the "Edit Basic Details" button from the "File" tab.
Step 4. Click the Change ![]() button to change the existing Entity Syncer to another user.
button to change the existing Entity Syncer to another user.
Step 5. The Find Users dialog will appear. You can search for an existing username using the email address used to create the account or the first and last name of the user.

Step 6. If the user already exists/appears, check the dial next to their name and select ![]() .
.
Step 7. Otherwise, a new user needs to be set up; click the Invite User ![]() button.
button.
Step 8. Enter the first name, last name, and email of the new user and click Invite.

Step 9. Click the Select ![]() button and then press Save
button and then press Save ![]() to complete saving the user at the role level.
to complete saving the user at the role level.
When the user appears on the File tab, next to the Change button, then they have been set up.
Qvinci automatically emails invites to new users and prompts them to set a password, otherwise existing users receive a notification of the new user role they are assigned to.
Create a File GL Viewer
If the GL is enabled for the Account an Admin, Leader, or Manager can invite a File GL Viewer. A File GL Viewer has no administrative access in Qvinci and is not the user assigned to sync the financial data. This user is strictly report-viewing in nature. A File GL Viewer may be assigned to see a single Entity in the Client Company or may be granted access to see multiple Entities, even across multiple Client Companies. File GL Viewers have all access as an Entity Viewer along with the ability to view the FILES complete GL. This permission does NOT have access to JE entry or management pages.
Step 1. The Admin, Leader, or Manager should navigate to the correct Client/Company via the top-left tab in the account.
Step 2. From the correct Client/Company visit the Manage > Entities menu.

Step 3. Click on the desired Entity name and then select the "Permissions" tab.

Step 4. Click the Add Users ![]() button in the File GL Viewer portion of the screen.
button in the File GL Viewer portion of the screen.
Step 5. If the user already exists/appears, check the dial next to their name and select ![]() .
.
Step 6. Otherwise, if a new user needs to be set up, click the Invite User![]() button.
button.
Step 7. Enter the first name, last name, and email of the new user and click Invite.

Step 8. Click the Select ![]() button to save the user at the role level.
button to save the user at the role level.
When the user appears on the Permissions page for the Entity then they have been set up.
Qvinci automatically emails invites to new users and prompts them to set a password, otherwise existing users receive a notification of the new user role they are assigned to.
Repeat these steps to add a user to another Entity.
Have Questions?
We're More Than Happy to Help
Schedule a call with Customer Success below, email us at support@qvinci.com or call us at 1-512-637-7337 Ext. 1 Available M-F, 7:30am-6:30pm CT and it is always FREE!

Comments
0 comments
Article is closed for comments.